Documentation
Feel free to check out our extensive documentation to find the solution that fits best for you. Take a look around and see what works!
Installing FSE Themes
Installing FSE Themes is quite easy. Basically installing this theme is almost the same as installing other themes. This part will guide you on how to install FSE Themes for a few minutes only.
You can download the FSE Themes through the Themeforest Download dashboard. You have 2 options for downloading your theme as shown below:
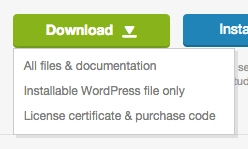
1. All files & Documentation
When you choose to download the All files & documentation option, you should unzip the downloaded file first. Then open the folder and find the filename-theme.zip to upload into your website (in the example below, it’s tourze.zip).

A common issue that can occur when installing WordPress themes is “The package could not be installed. The theme is missing the style.css stylesheet“ error message being displayed when uploading or activating the theme.
In this case, the reason you may receive this error is if you have uploaded directly the downloaded file without unzipping them first or you may upload the incorrect file.
After you unzip the downloaded file and find the filename-theme.zip now you are ready to install FSE Themes to your website. You can choose to install via WordPress admin or via FTP.
Installation via WordPress
1. Go to Appearance → Themes on your WordPress Admin Dashboard.
2. Click the Add New button at the top of the page and then choose Upload Theme option.
3. After that upload file filename-theme.zip and click Install Now button.
4. If the upload process has finished, click the Activate button.
5. Right after installing the theme, a wizard page will appeared and the next step you can follow in this article.
Install via FTP
1. Login into your FTP client.
2. Then access wp-content/themes/ directory on your host web server.
3. After that browse to find the filename-theme.zip file (look at the image above) and unzip the file.
4. Upload the filename-theme folder into wp-content/themes/ directory.
5. After uploading process finishes, go to your WordPress Admin Dashboard → Appearance → Themes and hit the Activate button.
6. Right after installing the theme, a wizard page will appeared and the next step you can follow in this article.
2. Installable WordPress file only
When you choose to download the Installable WordPress file only option, you can directly use the downloaded file to upload to your website. You can choose to install via WordPress admin or via FTP.
Installation via WordPress
1. Go to Appearance → Themes on your WordPress Admin Dashboard.
2. Click the Add New button at the top of the page and then choose Upload Theme option.
3. After that upload the downloaded file and click Install Now button.
4. If the upload process has finished, click the Activate button.
5. Right after installing the theme, a wizard page will appeared and the next step you can follow in this article.
Install via FTP
1. Login into your FTP client.
2. Then access wp-content/themes/ directory on your host web server.
3. After that browse to find the downloaded file and unzip the file.
4. Upload the filename-theme folder into wp-content/themes/ directory.
5. After uploading process finishes, go to your WordPress Admin Dashboard → Appearance → Themes and hit the Activate button.
6. Right after installing the theme, a wizard page will appeared and the next step you can follow in this article.
Setup Your FSE Theme
Wizard Setup
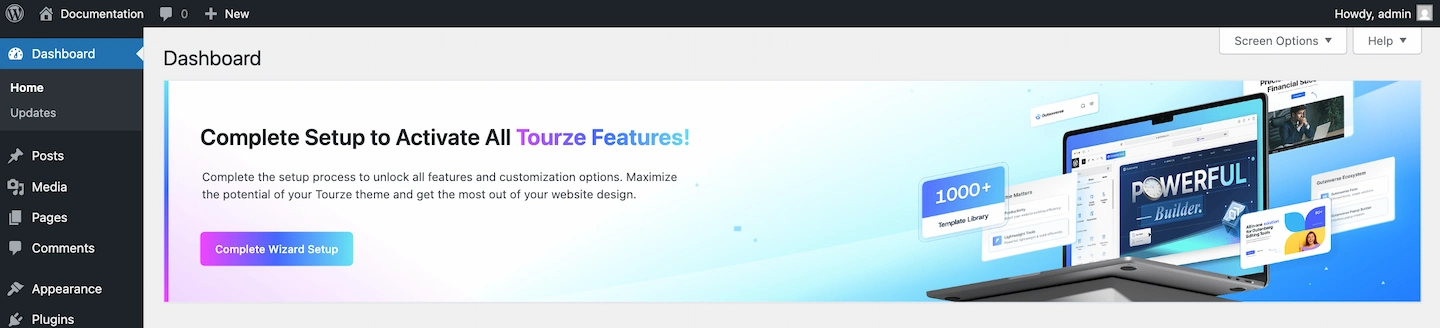
After installing the FSE theme, you will be redirected to the Wizard setup page. This setup wizard is crucial for configuring your theme and ensuring all its features work seamlessly. It will guide you through the necessary steps to customize and optimize your theme according to your needs. Following the wizard’s instructions will help you get the most out of your FSE theme and ensure everything is set up correctly.
Common occurrence: “I skipped the wizard setup, how do I get back?”
Don’t worry if you skipped the wizard setup; you can easily return to it later. Just click the “Complete Wizard Setup” button on the notice banner in your admin dashboard to resume the setup process.
1. Install Required Plugins
To access your FSE theme’s features, please install the required plugins.
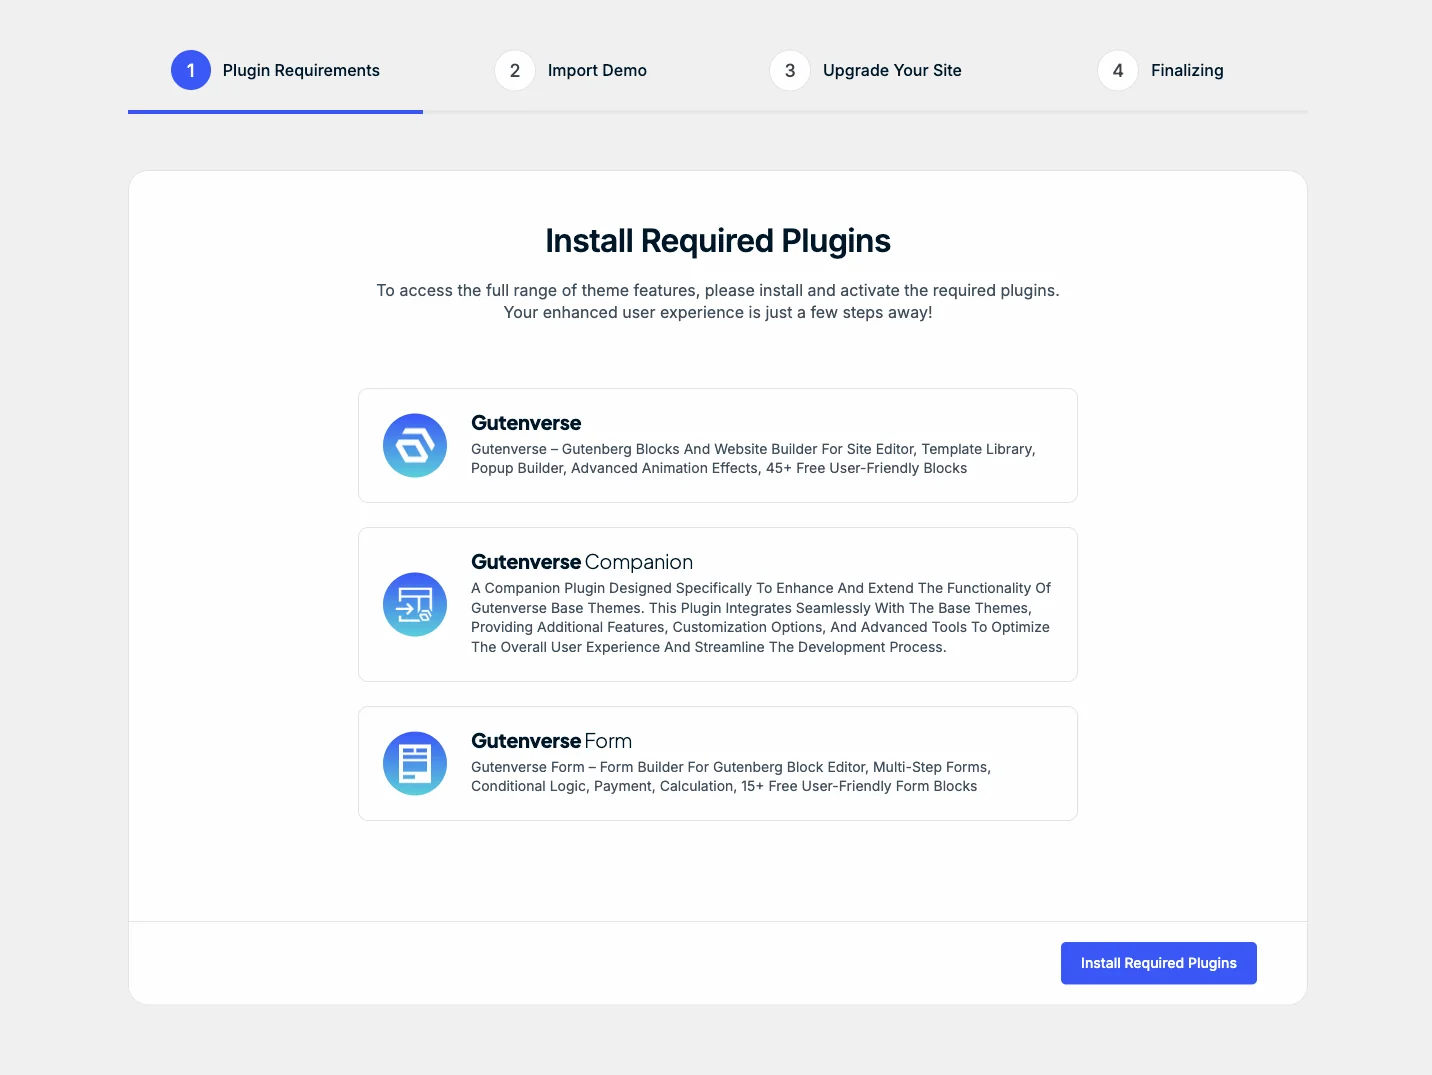
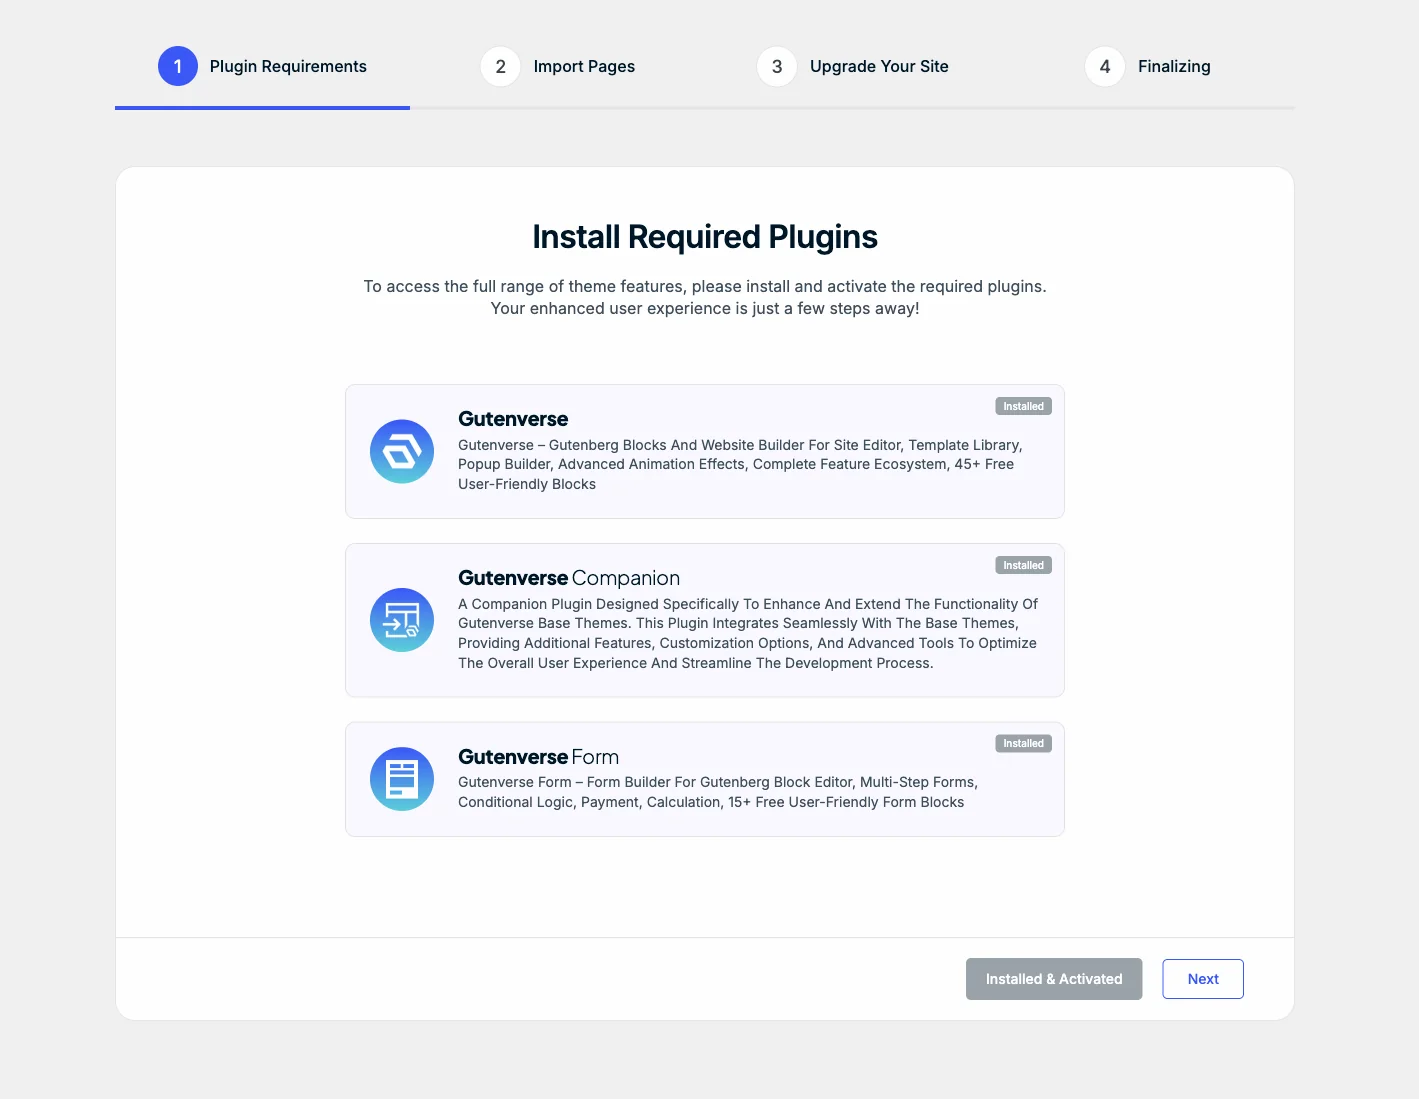
Once you’ve installed the required plugins, click the Next button to proceed to the next step.
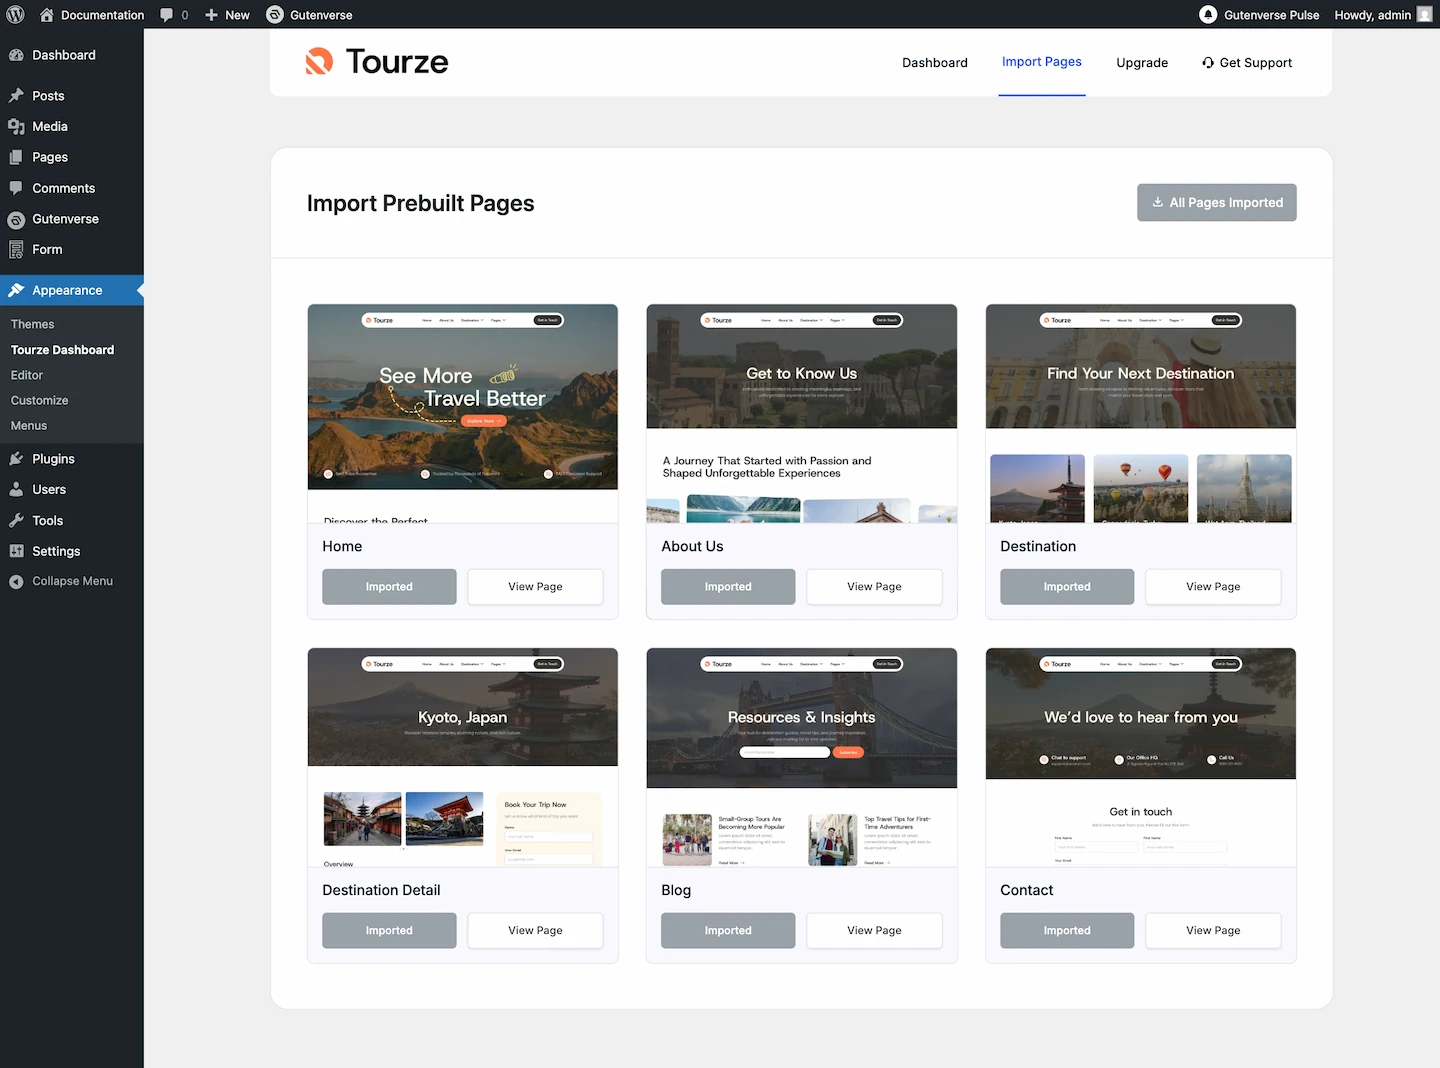
2. Import Demo
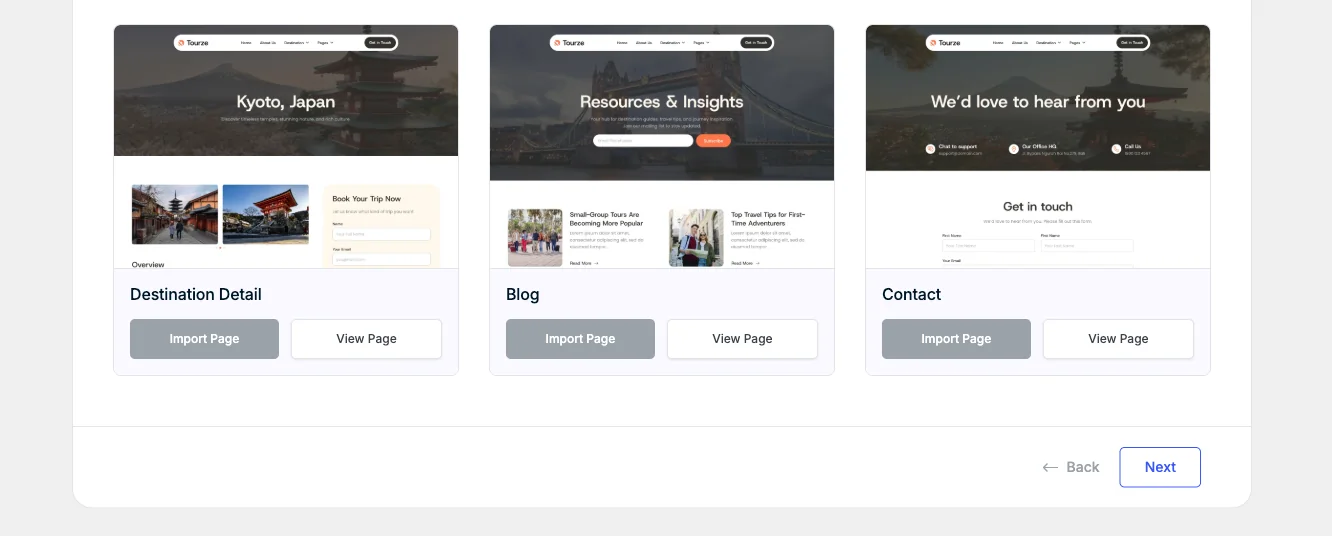
In this step, you have the option to select which page template you would like to import based on your preferences and needs.
You can choose a single template that best fits your website or, if you prefer, import all available templates at once.

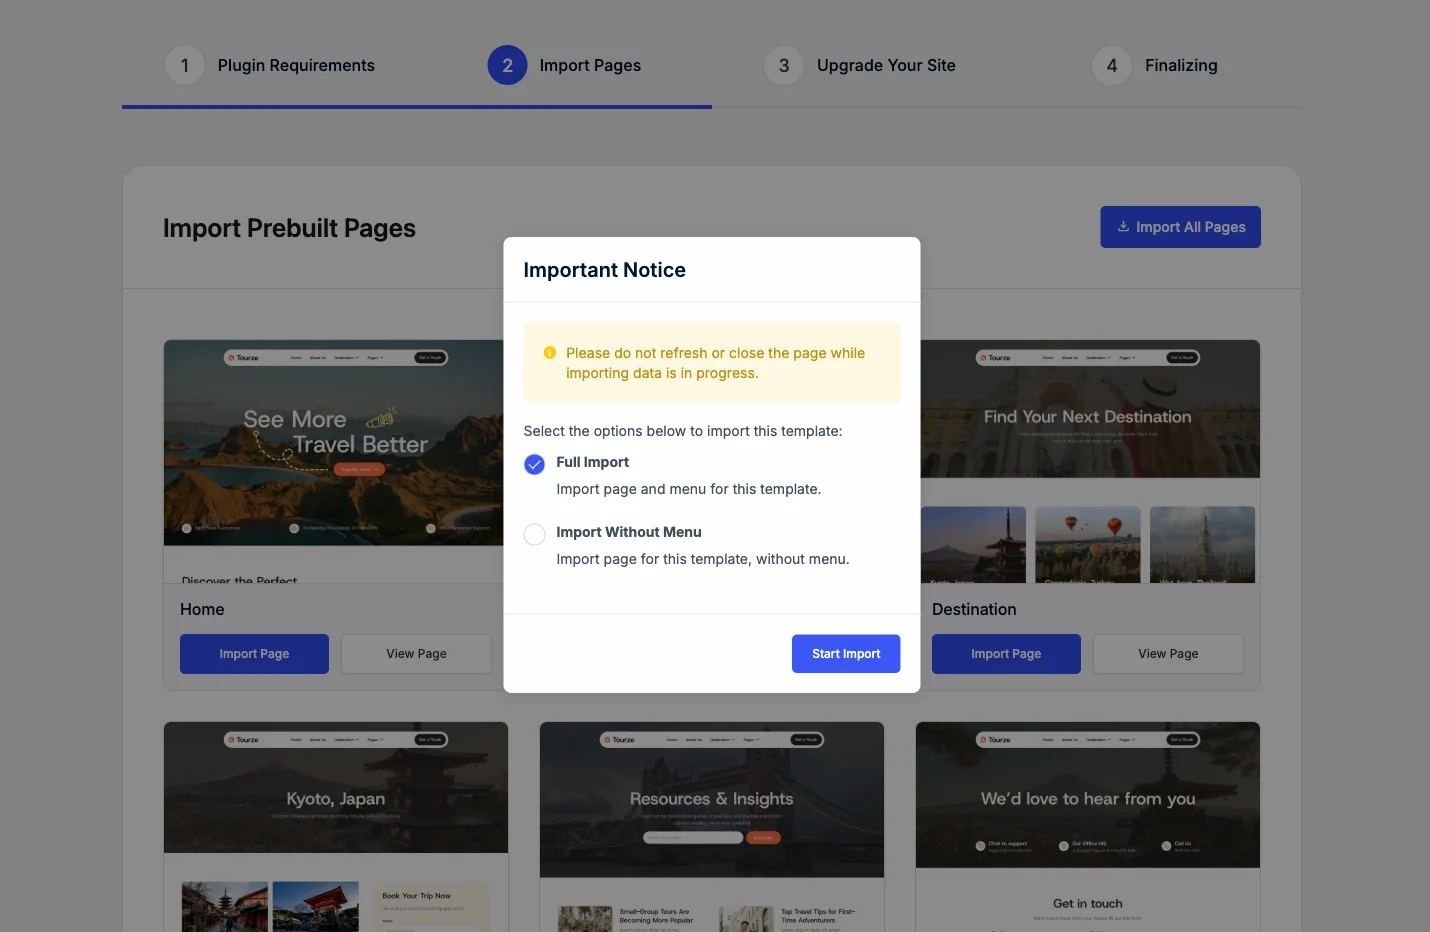

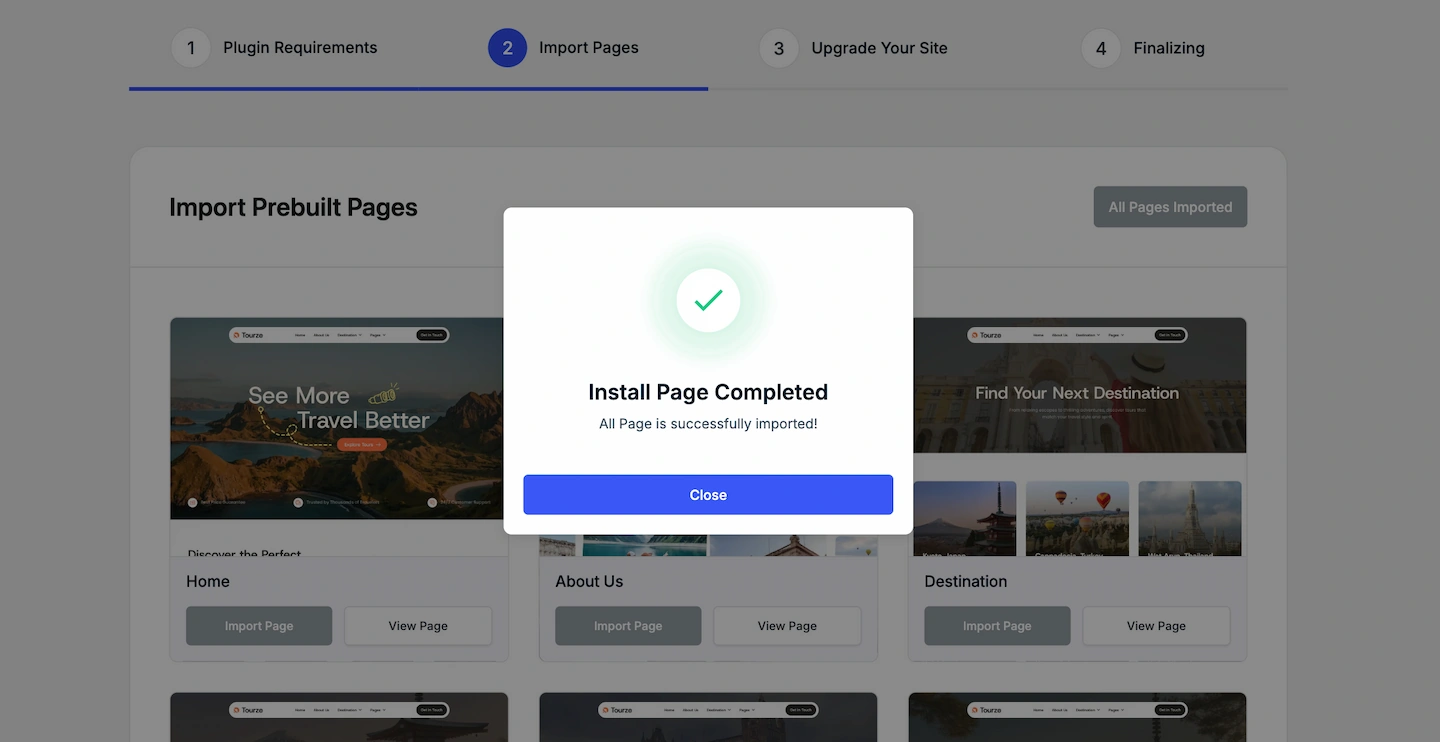
After you’ve finished importing your selected page templates, click the “Next” button to proceed.
3. Final
In this section, if you’re interested in upgrading to the premium version, click the “Upgrade to PRO” button to learn more about the additional features and benefits available.
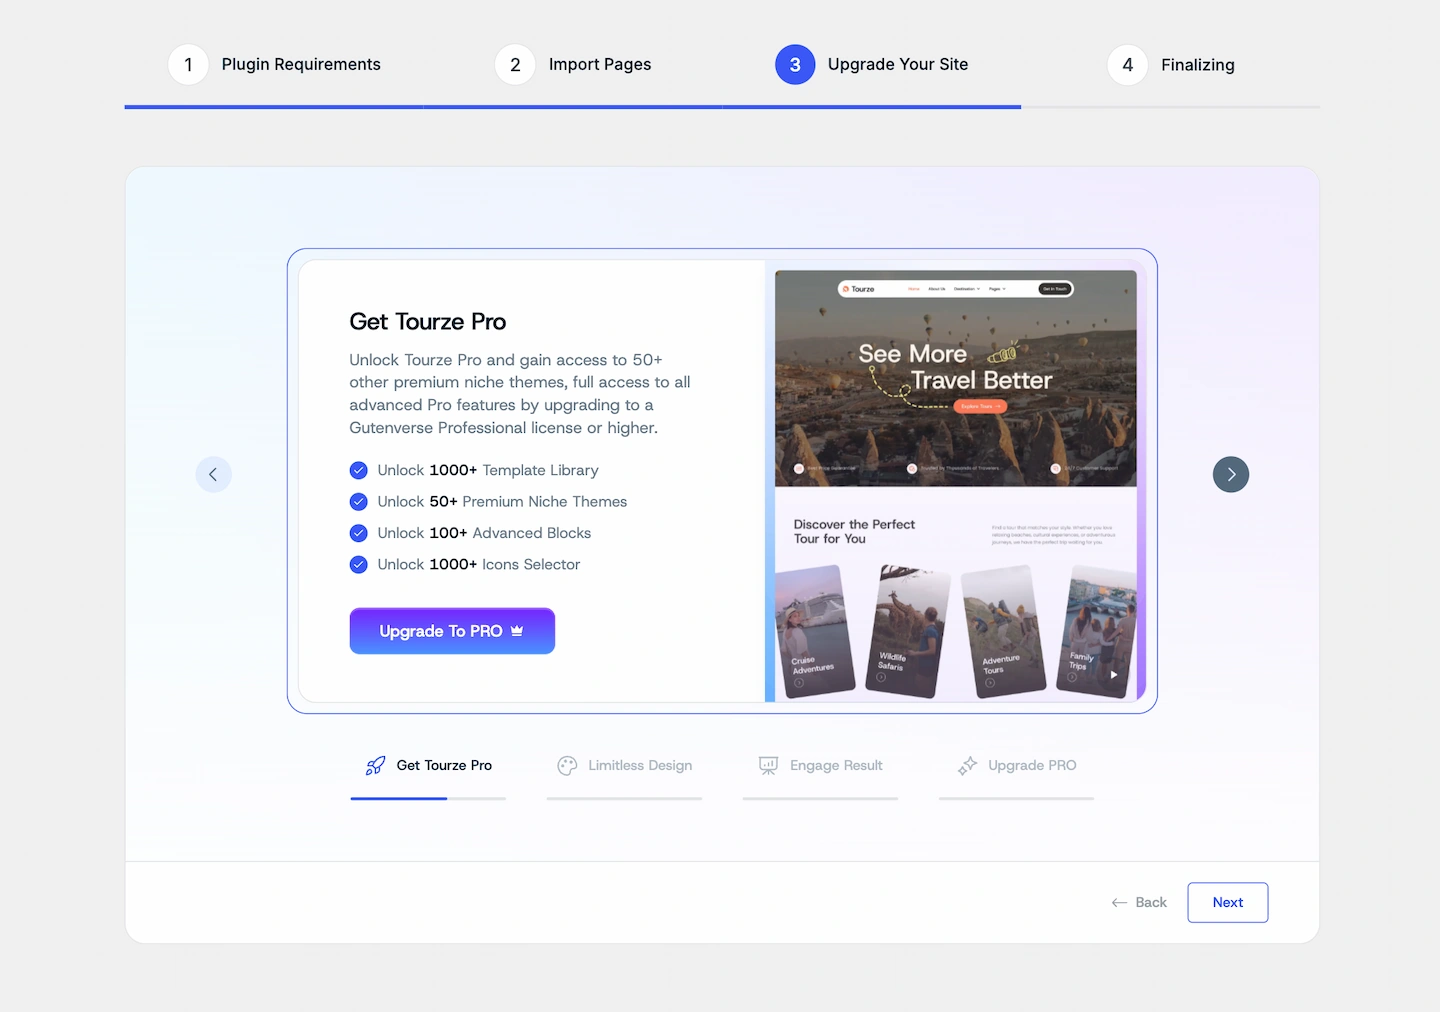
You can click the “Next” button to proceed to the final page of the wizard.
On this final page, click the “Visit Dashboard” button to be redirected to the FSE theme dashboard.

Dashboard Page
Inside the FSE theme dashboard, you’ll find several options that you might have missed during the wizard setup:
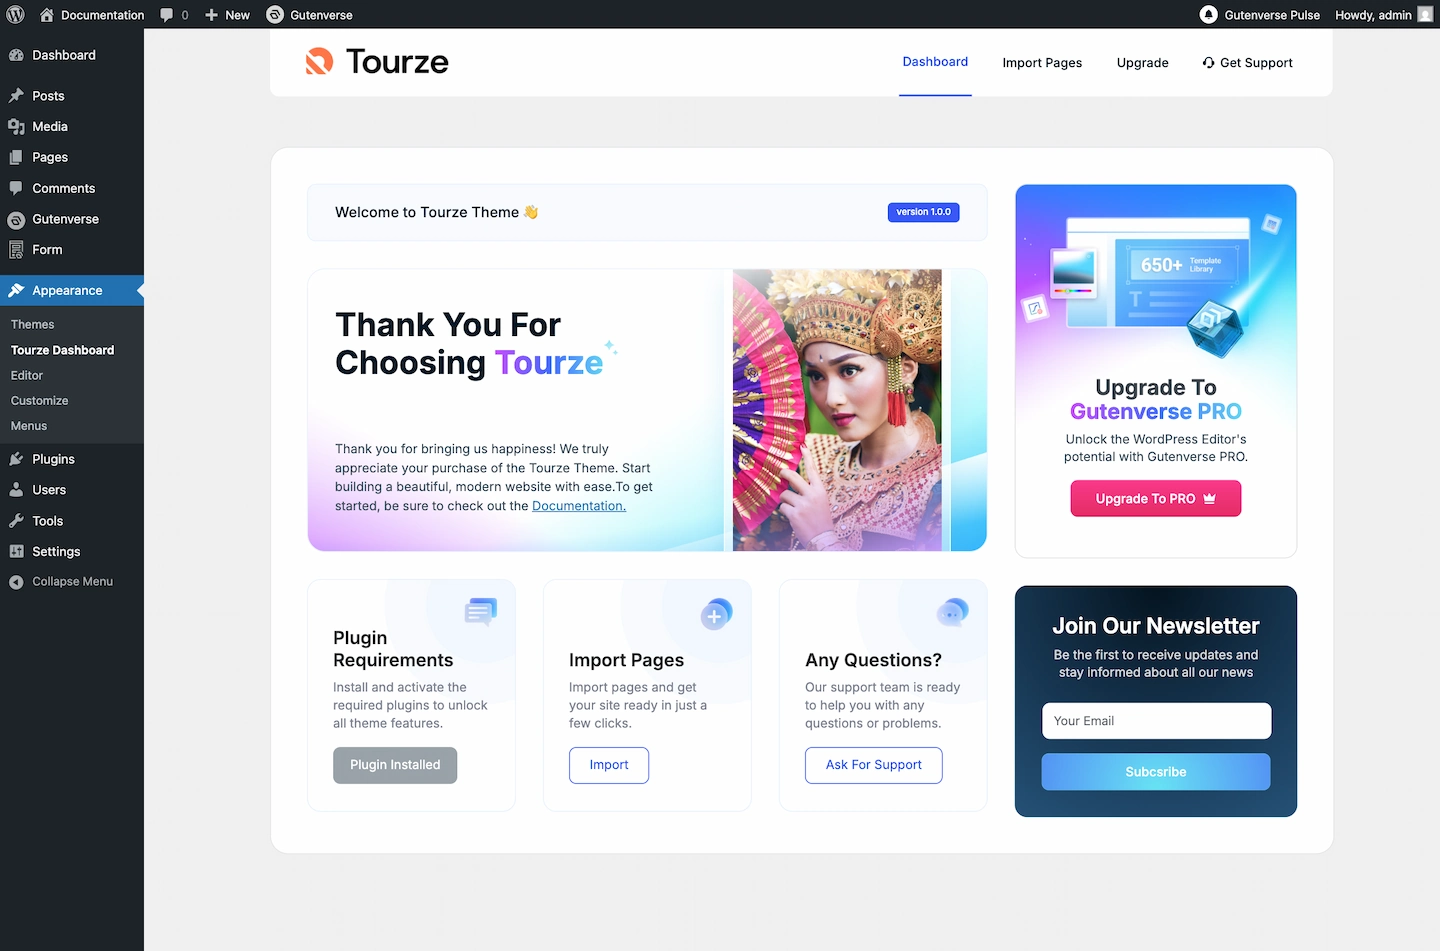
Your theme setup is now complete.
The next additional step is to set up a form action, which is necessary if your FSE theme utilizes the Gutenverse Form plugin or includes any contact forms. This step ensures that your forms function correctly and can handle submissions as intended. Please check in this article.
How to Modify Header & Footer?
The header and footer are essential components of your website.
The header typically contains your logo, navigation menu, and key contact details, while the footer often includes copyright information, additional links, and social media icons.
Modify from Template Editor
From the admin dashboard, go to Appearance → Editor.
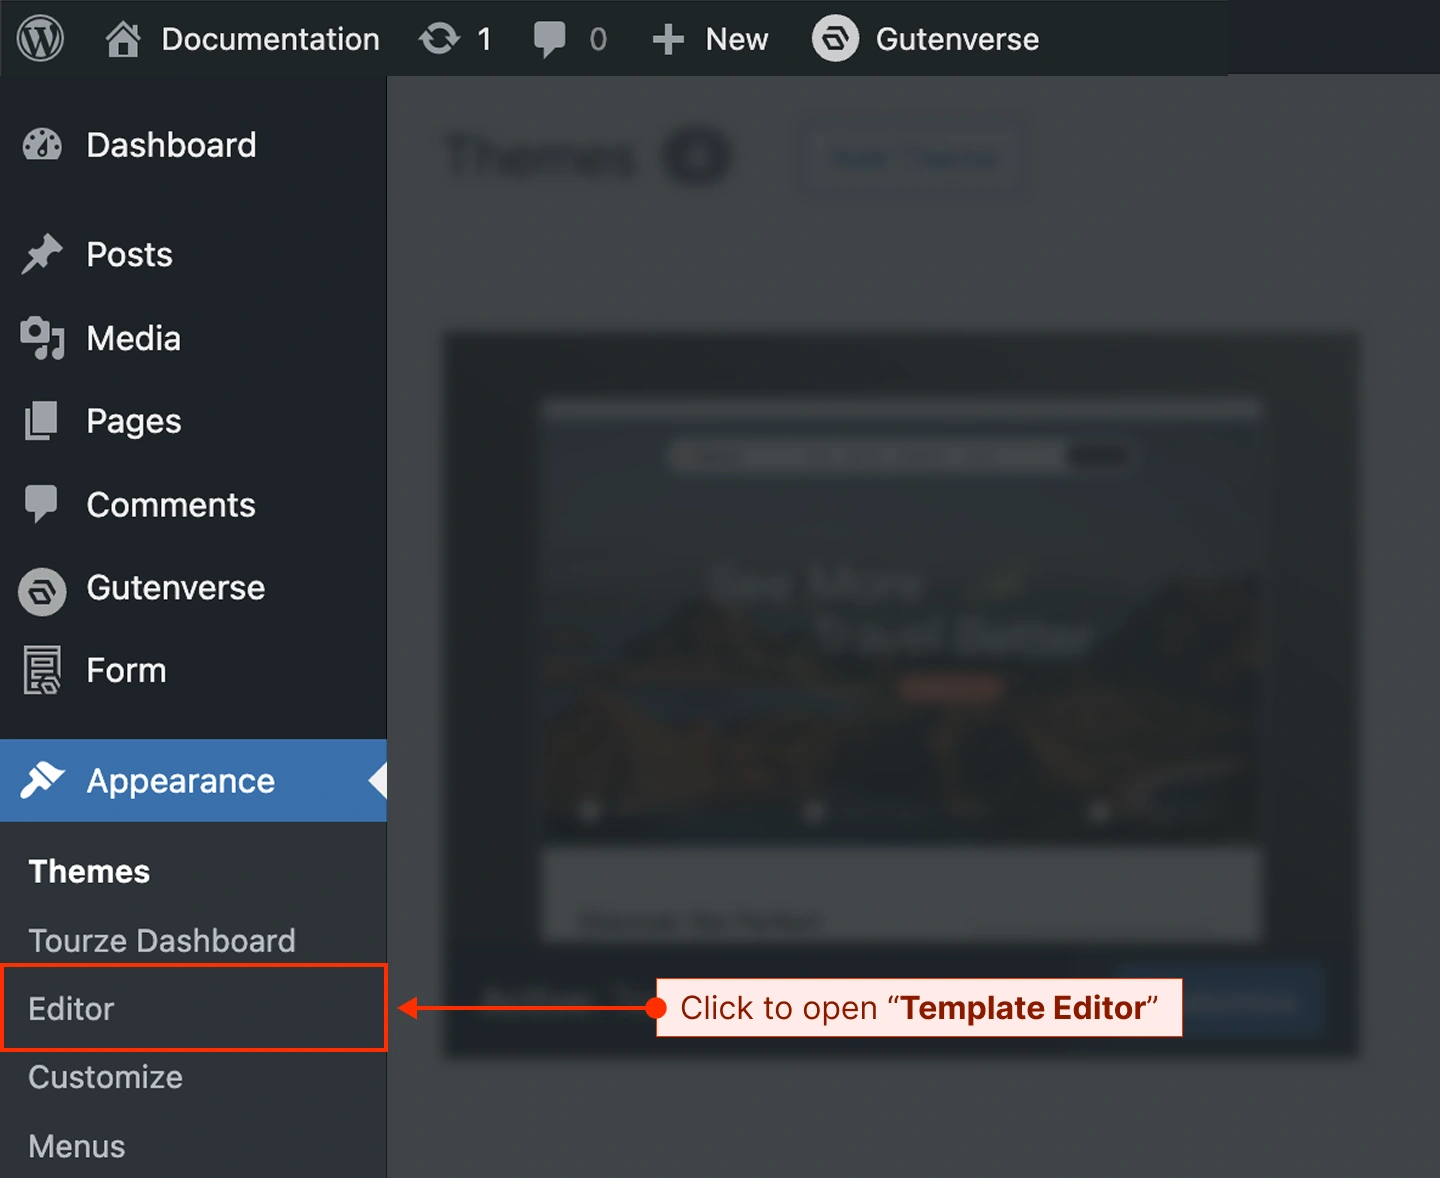
You will enter the template selection screen (please check the image below).
On the template selection screen, select the Patterns option.
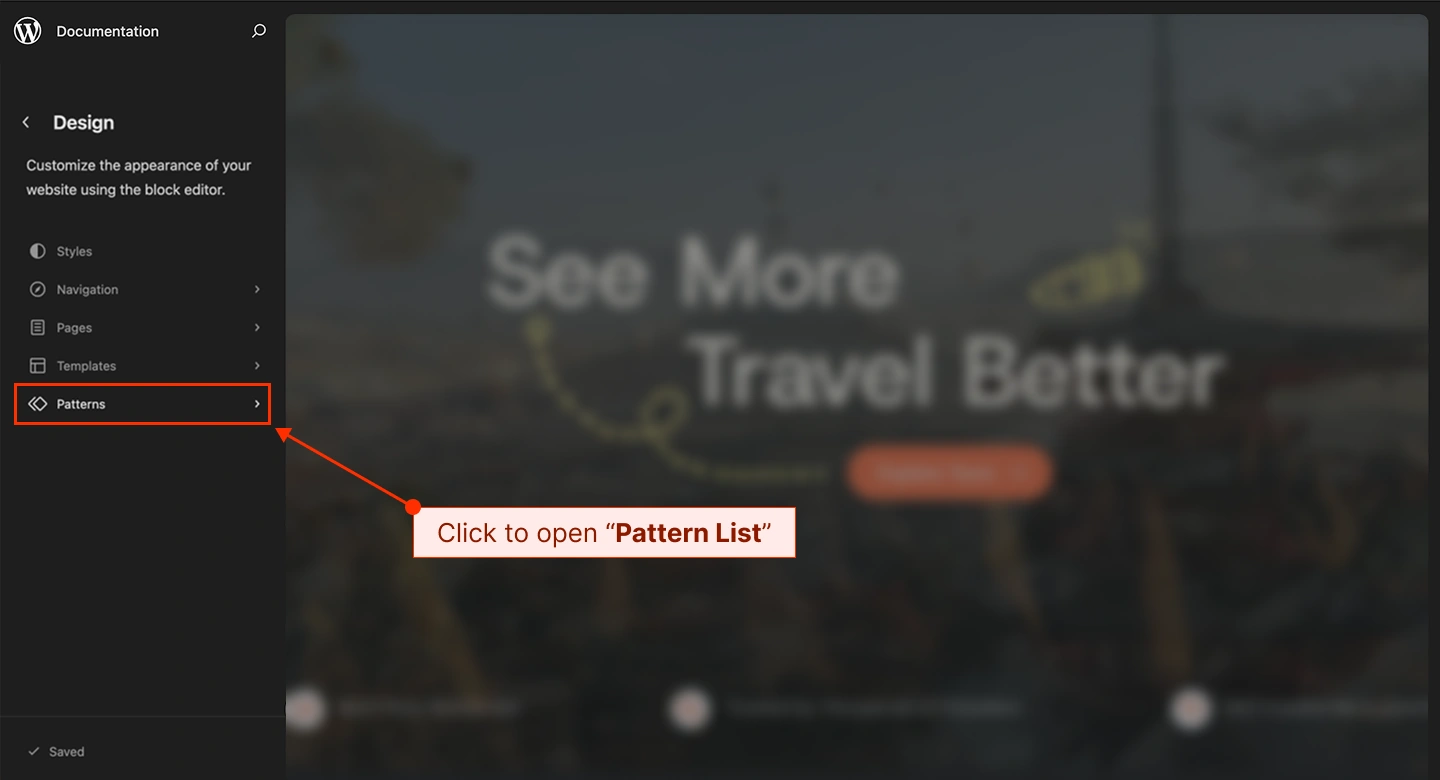
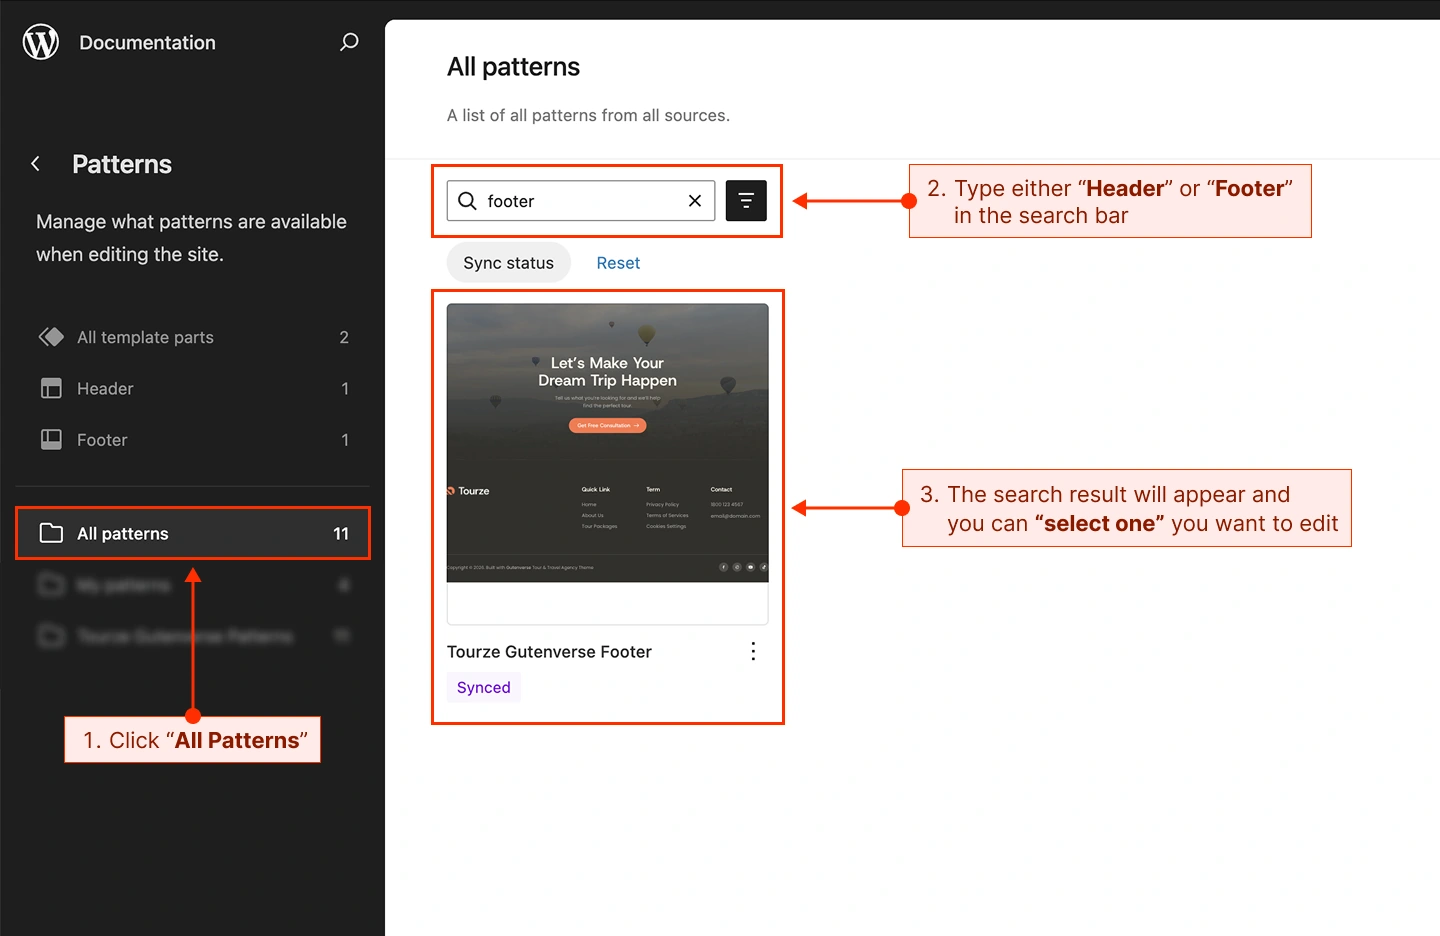
A pattern editor will open, and you can start editing the header/footer.
Click on the “≡” icon to open the block navigation menu. Select the block you want to edit.
A sidebar panel will appear on the right and you can modify any settings for the selected block.
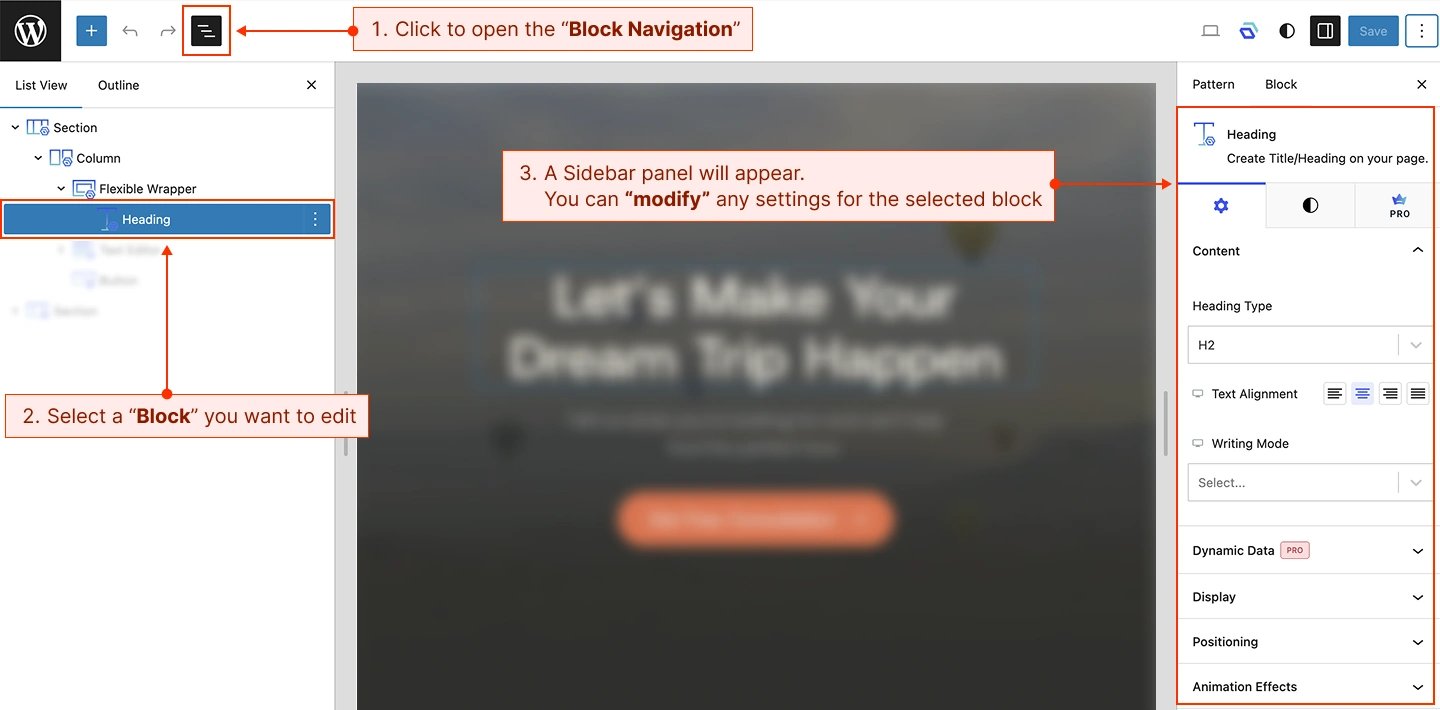
Now you can start customizing your header/footer appearance to better suit your needs.
Happy editing!
How to Modify Blocks & Patterns?
First, head to which pages you want to modify by going to Pages → All Pages and selecting the page you want to modify.
1. Modifying Blocks
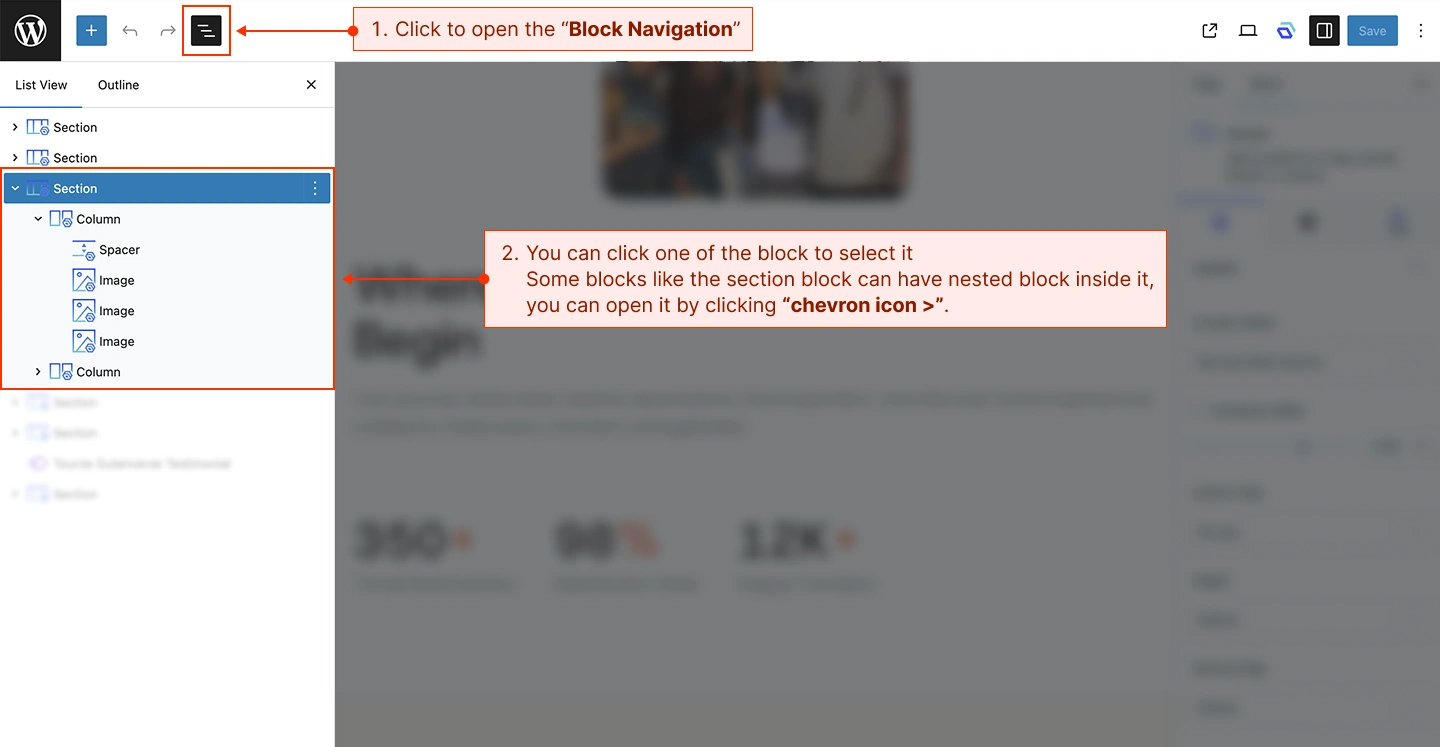
Click on the ≡ icon to open the navigation panel which contains all the blocks on that page.
You can click one of the blocks to select it.
Some blocks like the Section block can have nested blocks inside them, you can open it by clicking the > icon.
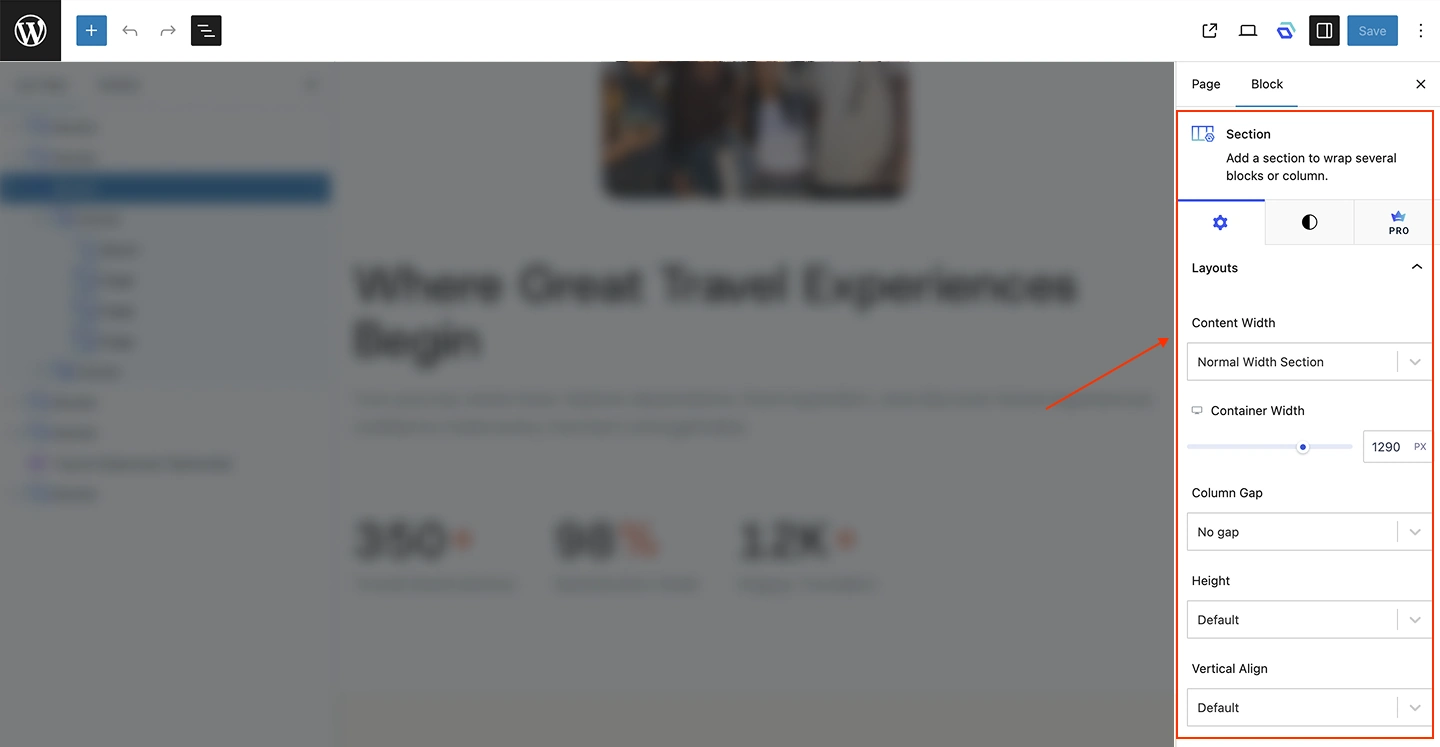
Selecting a block will open the right sidebar panel which contains settings for that block. You can modify these settings.
For example in the image below, the selected block is the Section block.
On the right sidebar panel, you can modify its Container Width, Height, and Vertical Align.
Aside from selecting a block in the block list navigation, you can also directly click on it to select it.
Clicking the block directly will also open the right sidebar panel.
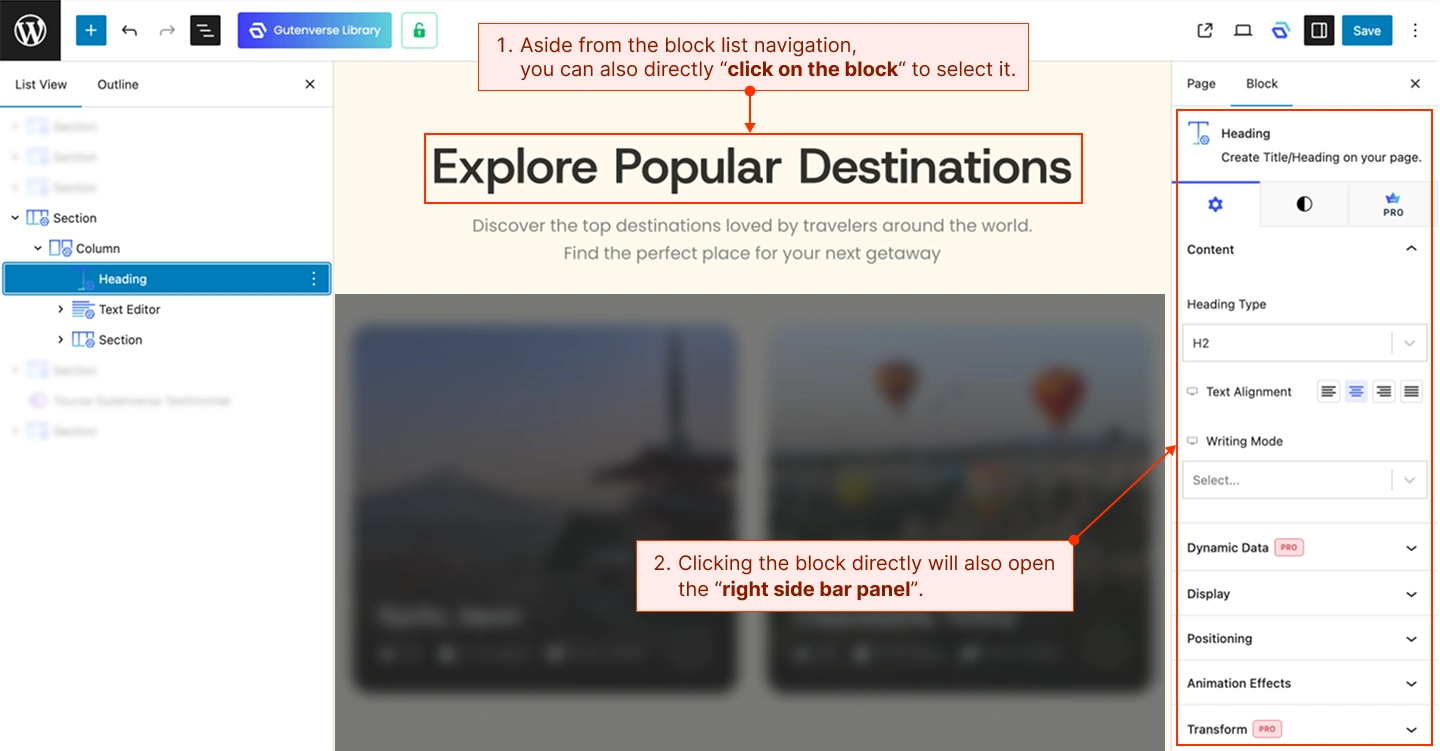
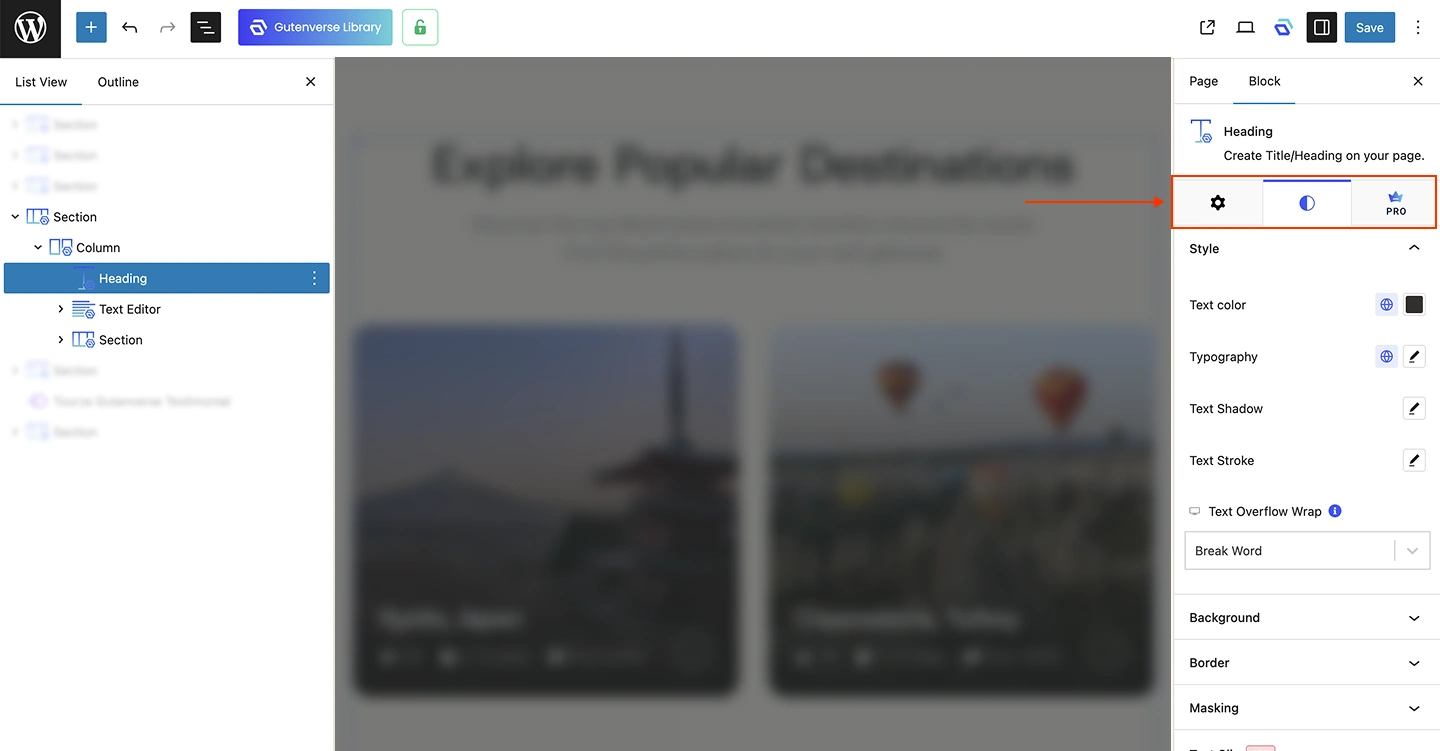
In the right sidebar panel, you can switch between tabs settings.
General settings usually can be found on the first tab with the gear icon.
2. Modifying Patterns
A pattern is a collection of blocks built into one single group. What makes it useful is that the pattern is reusable everywhere.
There are two types of patterns, normal patterns and synchronized patterns.
You can find sync patterns by looking at the block with a purple rhombus icon
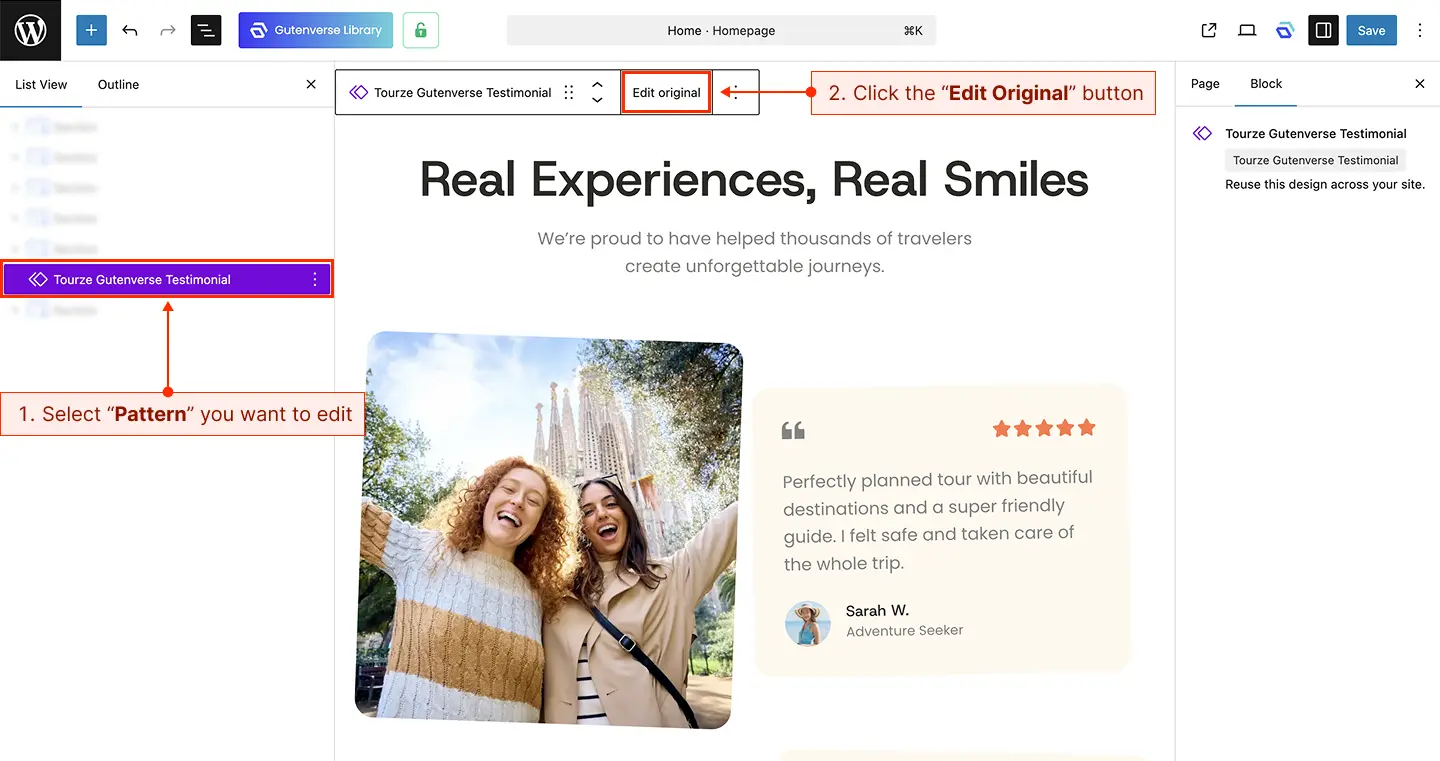
Modifying patterns is almost similar to modifying blocks. The difference is you can’t directly edit it inside the pages.
First, you need to select the pattern block, and on the toolbar click the Edit Original button to edit it.
After that, a special page to edit the pattern will appear and you can edit the pattern here.
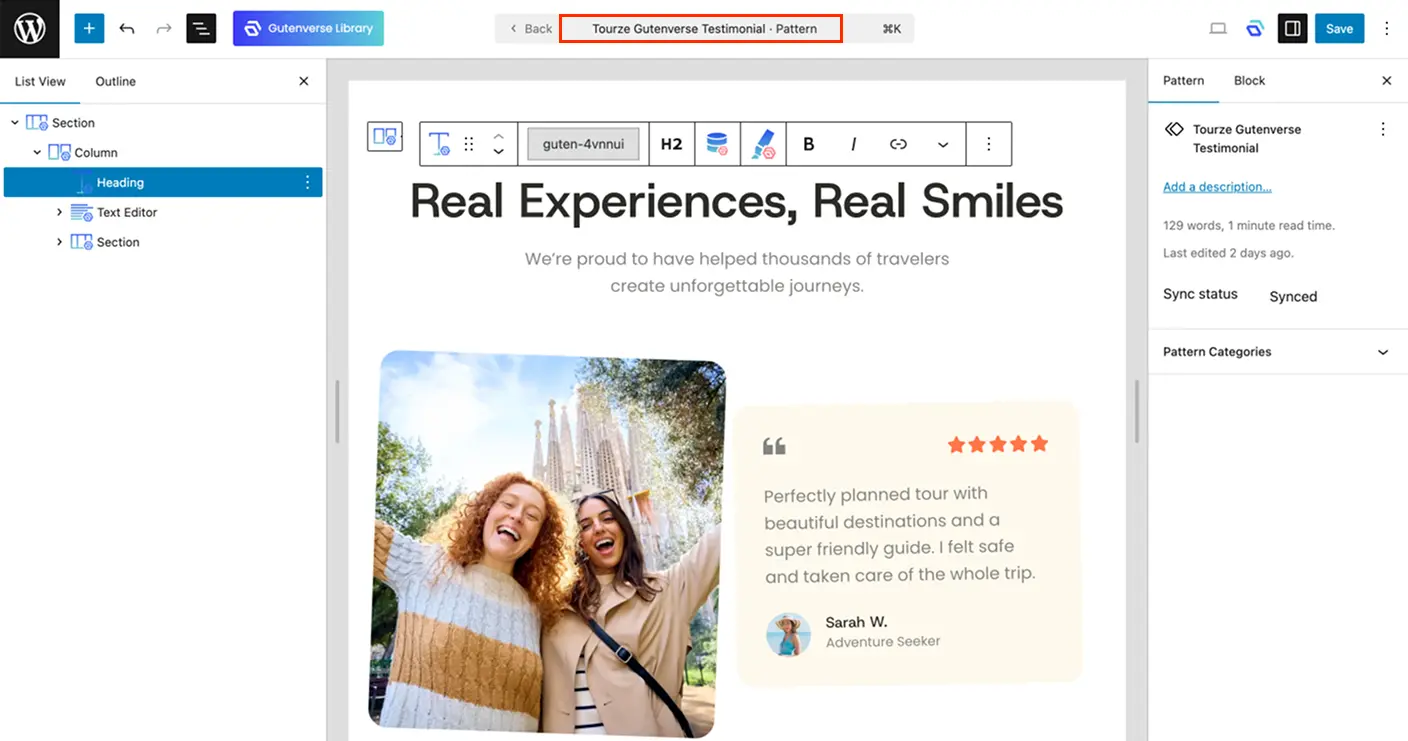
That’s all the basics on how to modify blocks and patterns.
Happy editing!
Setup Form Action
Configuring the form action is a crucial step if your FSE theme includes a contact form. This setting specifies the destination where form data will be sent and processed when users submit their information.
1. SMTP Setup
SMTP which stands for Simple Mail Transfer Protocol is an email protocol used to send email messages from one email account to another. Without this setup, you won’t be able to send email messages to other email accounts.
The easiest way to use this protocol in WordPress is by installing a plugin from WordPress.org. You can go to Plugins → Add New and search for the keyword “SMTP”. There are many SMTP plugins you can choose from.

For example, you can use WP Mail SMTP to set up SMTP for your site.
To set it up, you can check on their article which explains in detail how to set SMTP using many choices of mailer services, including the popular Google/Gmail.
After you’re done setting up SMTP, the next thing is to set up your contact form. Please check this article on how to do it.
2. Create A Form Setting
After you set up SMTP, you can start creating a form.
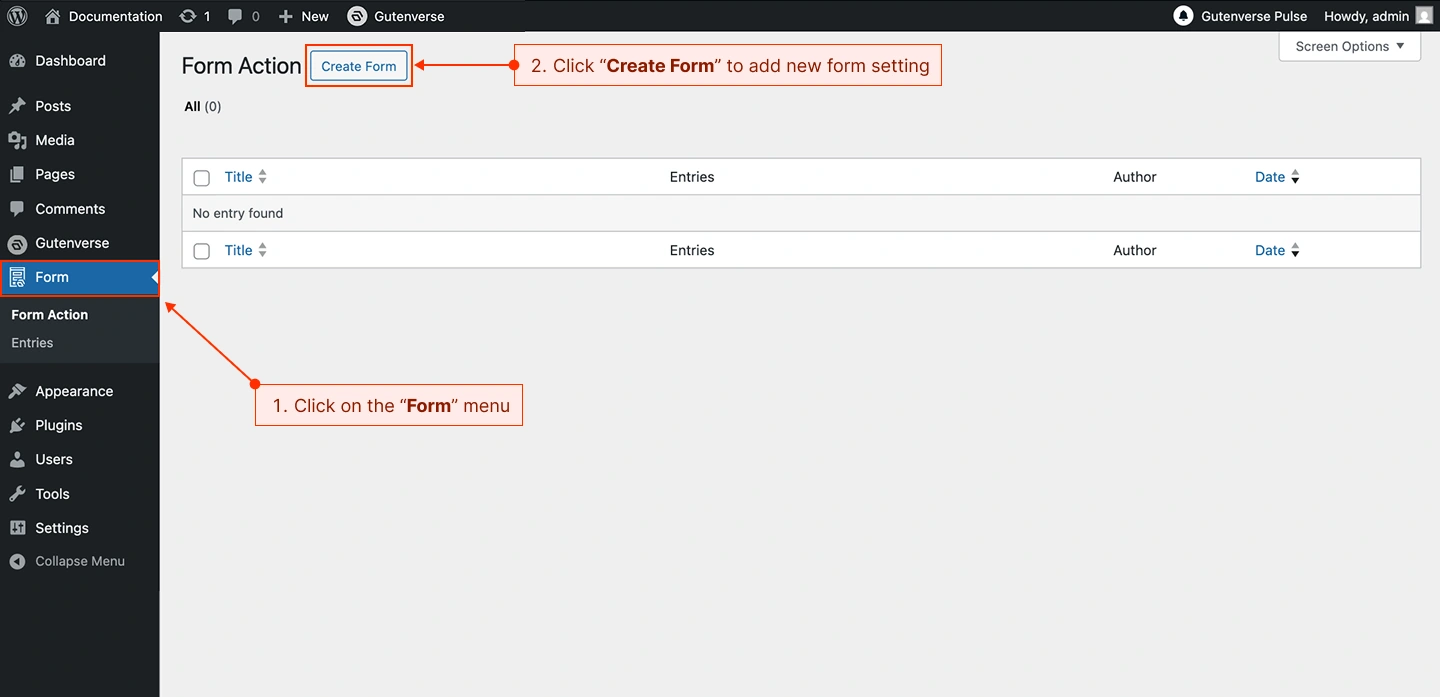
1. From the admin dashboard, click on the Form menu on the left sidebar.
2. Click the “New Form Action” button to add a new form setting.
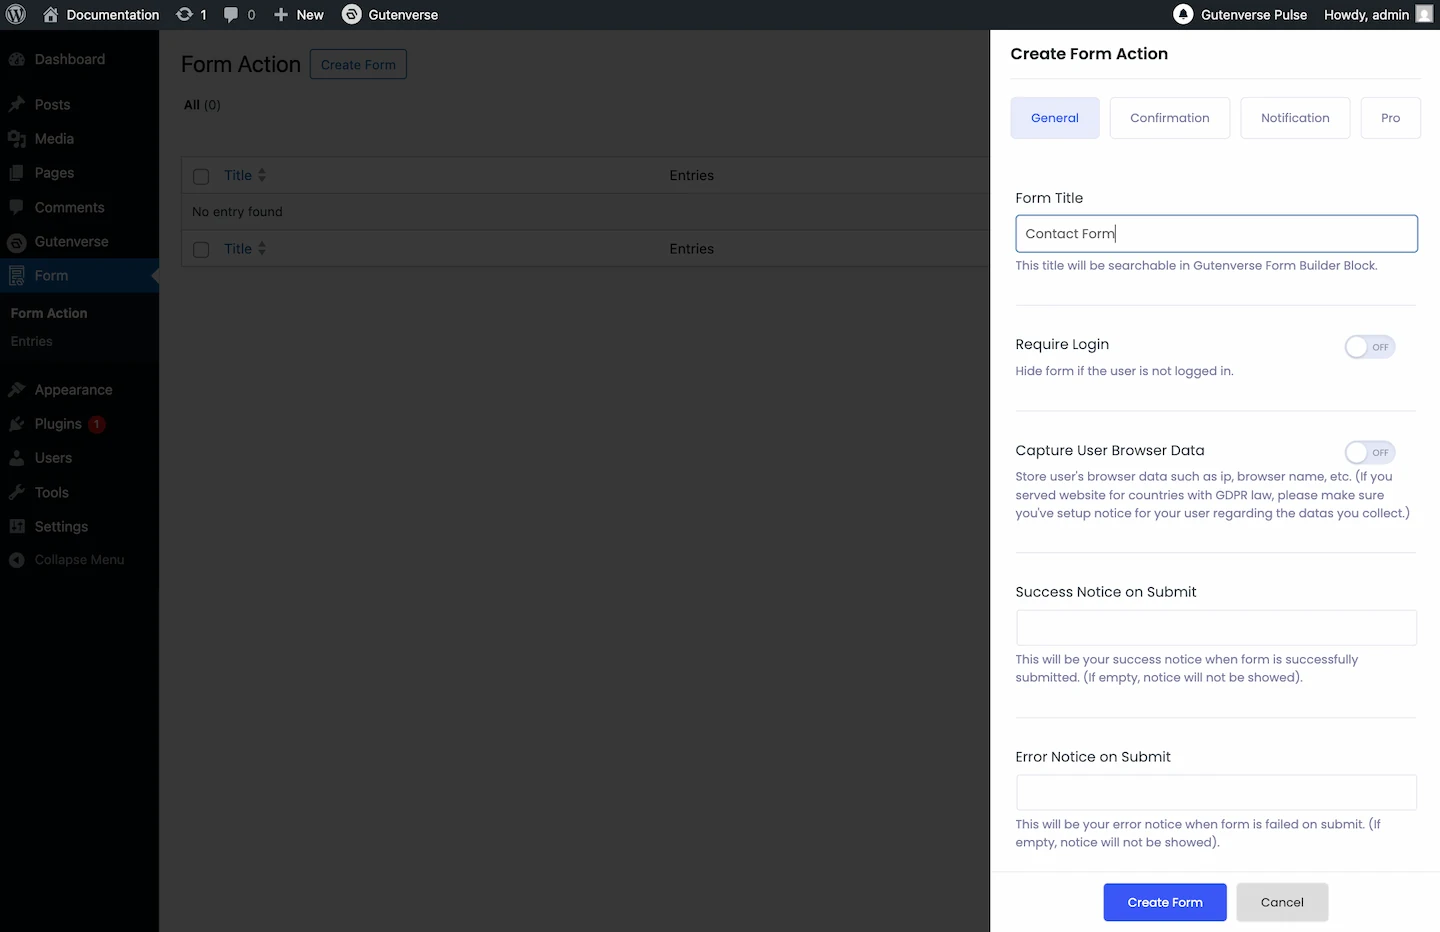
3. Then a popup will appear with four tabs: General, Confirmation, Notification and PRO.
4. Input your basic form setting in the General tab, such as form name, success & error message, form requirement, etc.
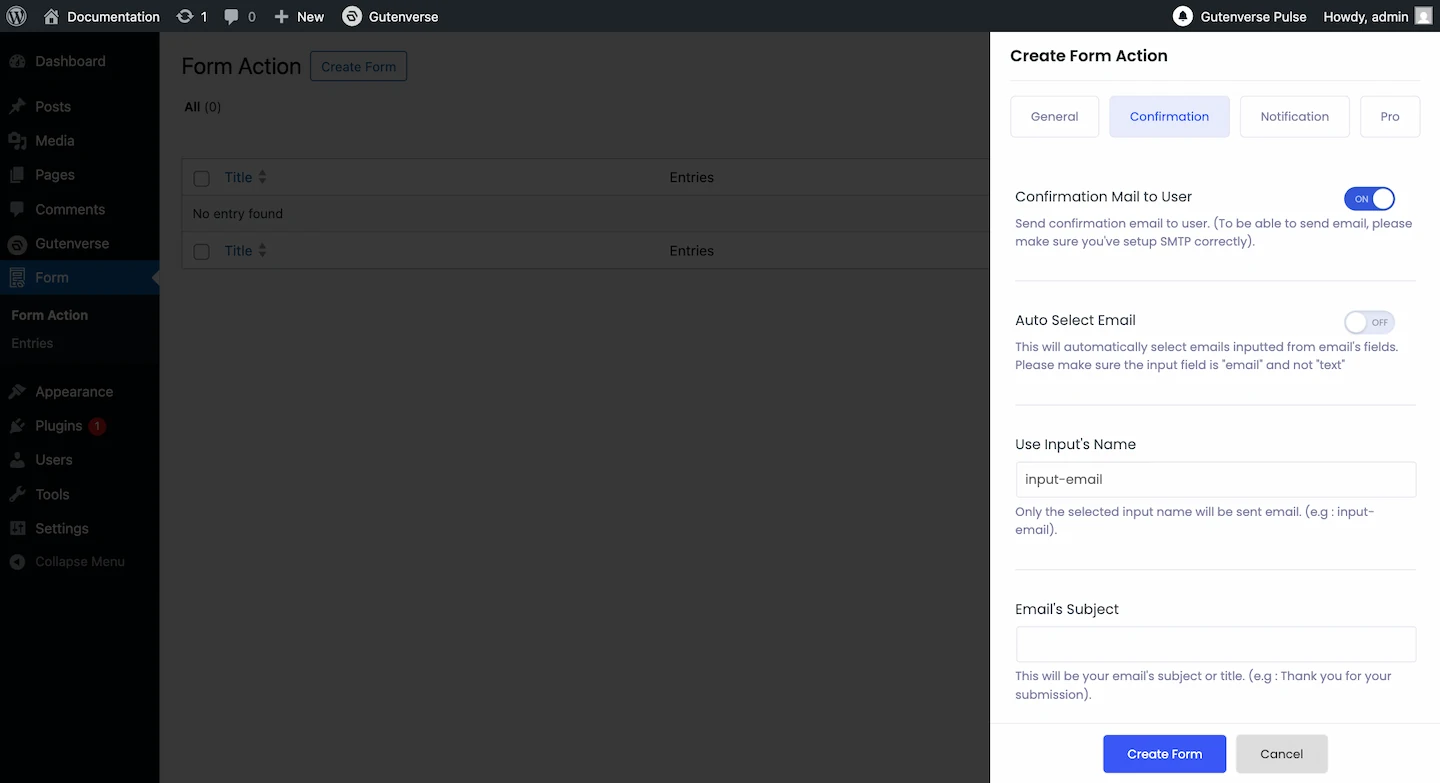
5. In the Confirmation tab, you can enable this option to give your user an email notification when they submit a form. (This only works if your form contains an email input box).
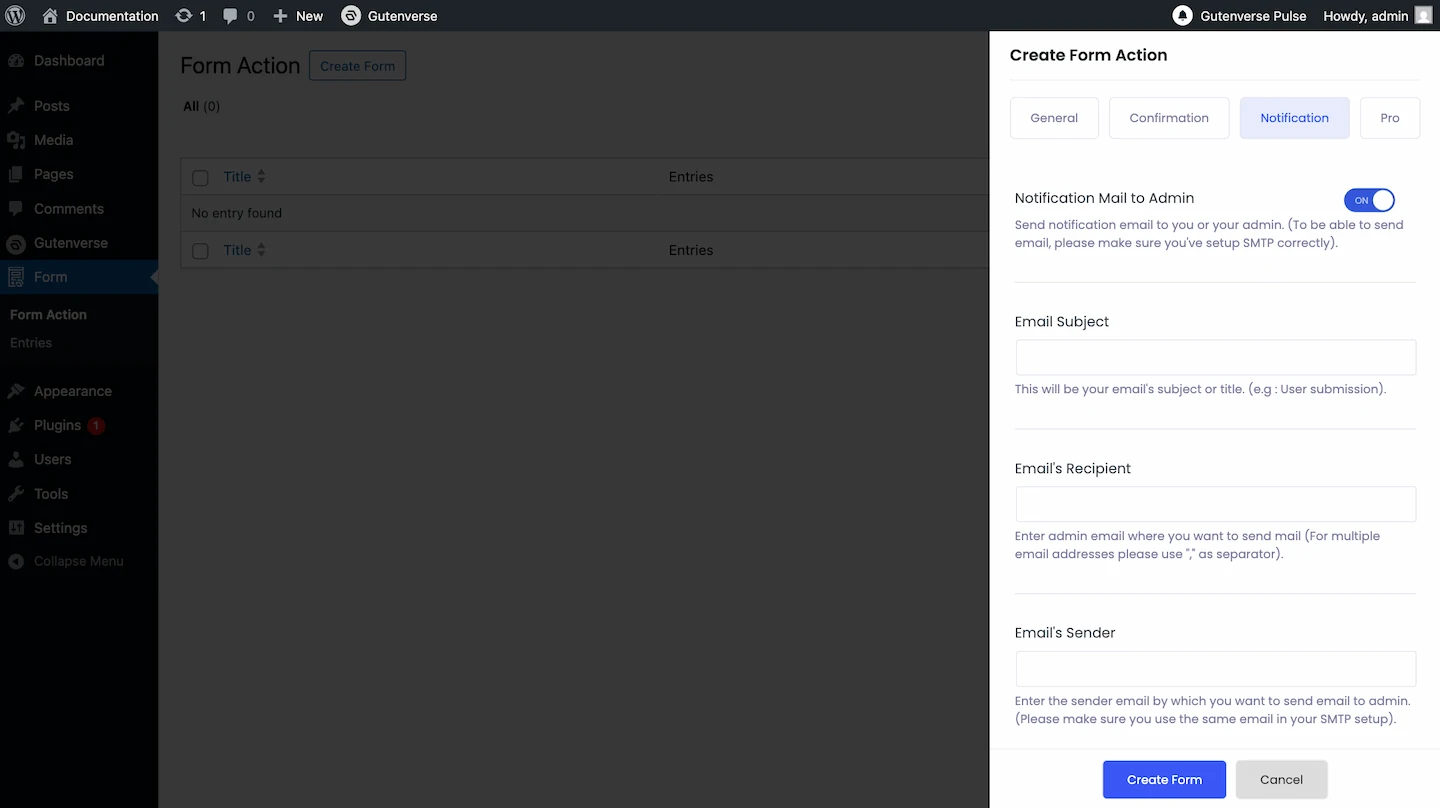
6. In the Notification tab, you can enable this option to make the system send you or your site administrator an email when a user submits a form.
3. Assign the Form Setting
After you create a form setting, go to the Page or Template where your form is located. Then click on the Form Builder block and choose/assign a form.
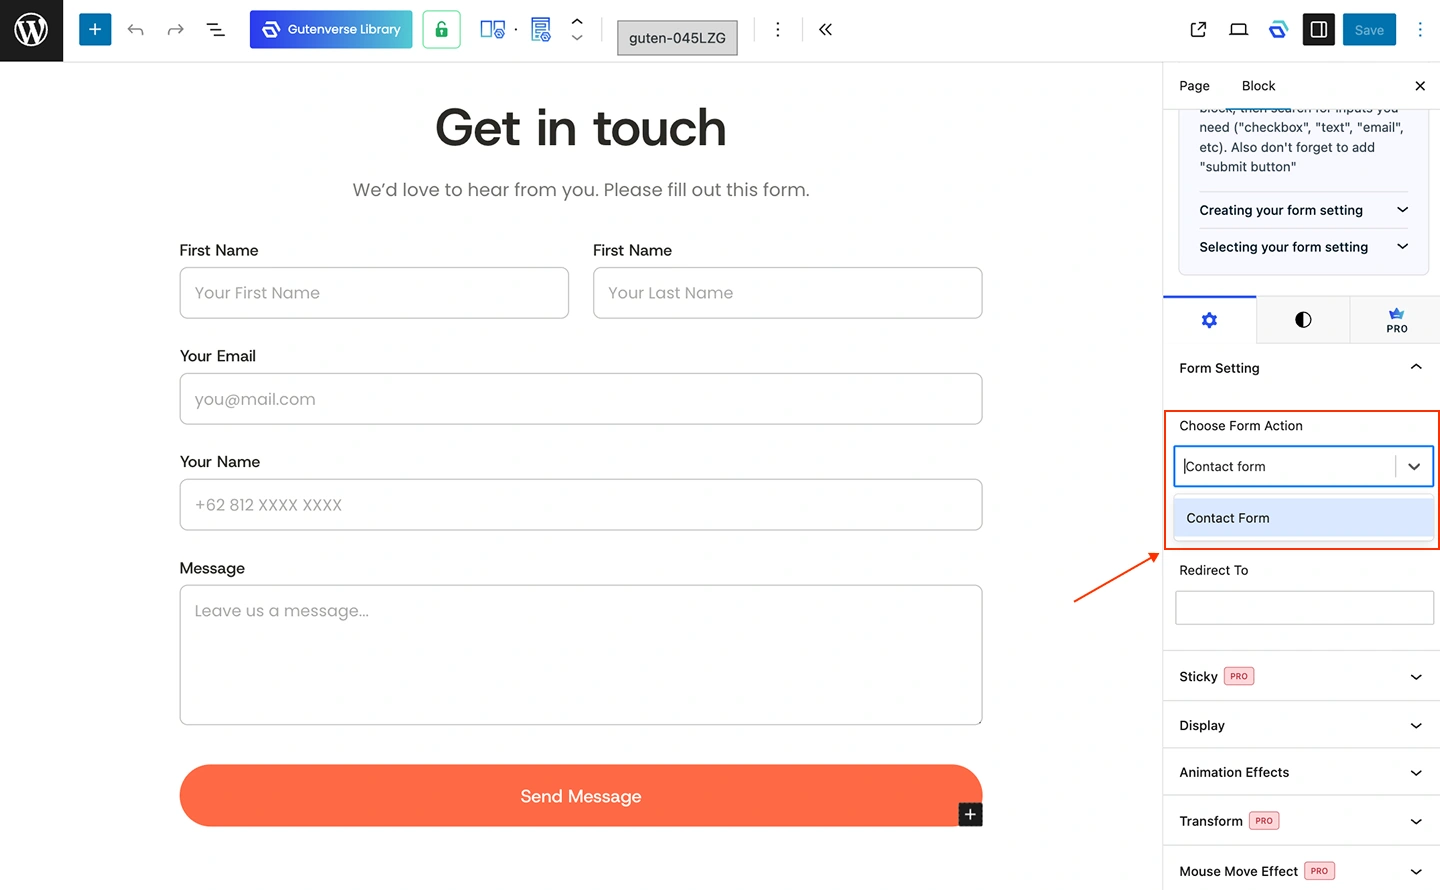
Your form has been successfully set up and is ready to use.
Issue with Importing Demos
If you’re experiencing issues when importing a demo, try the following solutions:
1. Deactivate Other Plugins
Conflicts between plugins can sometimes interfere with the import process.
Try deactivating all plugins except those with “Gutenverse” in their name. Then, attempt to import the demo again.
2. Use the Parent Theme
If you’re currently using a child theme, switch to the parent theme before importing. Some demo content may not import correctly when a child theme is active.
3. Increase Memory Limit
Go to Dashboard → Gutenverse → System Status, and check whether your PHP Memory Limit and WP Memory Limit meet the recommended values.
If they’re too low, consider increasing them, then try the import again.
If none of the above solutions work, feel free to contact our support team — we’re happy to help!
Copyright © 2026 Best BlockTheme. All rights reserved.